Give Your ESXi Host a Personal Touch with a Custom Welcome Message – the PowerShell way


Ever wanted to spruce up that default login screen on your ESXi host or have some fun with your DCUI? Then you’re in the right place! In this post, I’ll walk through using the Annotations.WelcomeMessage advanced setting to display a custom welcome message on your ESXi host. Best of all, I’ll share a neat PowerShell function to make it easy.

Why Customize the Welcome Message?

  • Personalization: Display a personal greeting, instructions, or a quick reminder for anyone logging into the ESXi console.
  • Useful Info: Share contact details or support info in case someone needs to know who to call if something breaks.
  • Fun Factor: It’s always nice to see something other than “Welcome to VMware ESXi” from time to time at least in homelab.
  • Security: Display security/legal warning.

The Advanced Setting: Annotations.WelcomeMessage

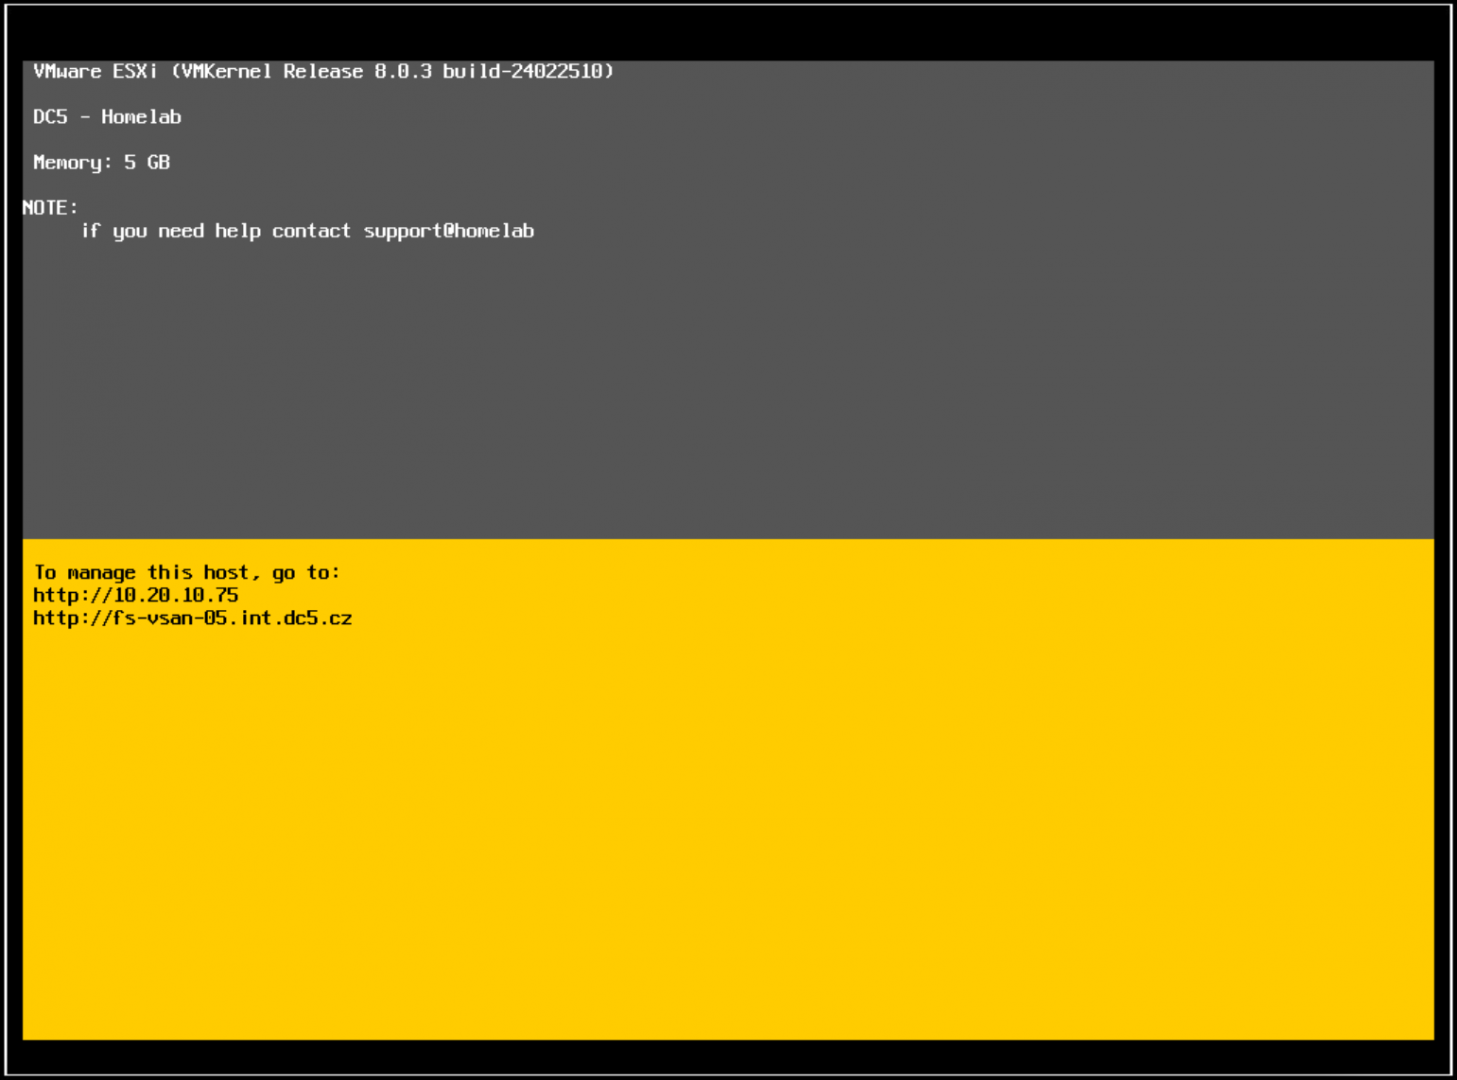
Annotations.WelcomeMessage is an advanced ESXi host parameter. It’s where you store the text you want displayed in DCUI on the default console screen (replacing some default text, similar to screenshot below).
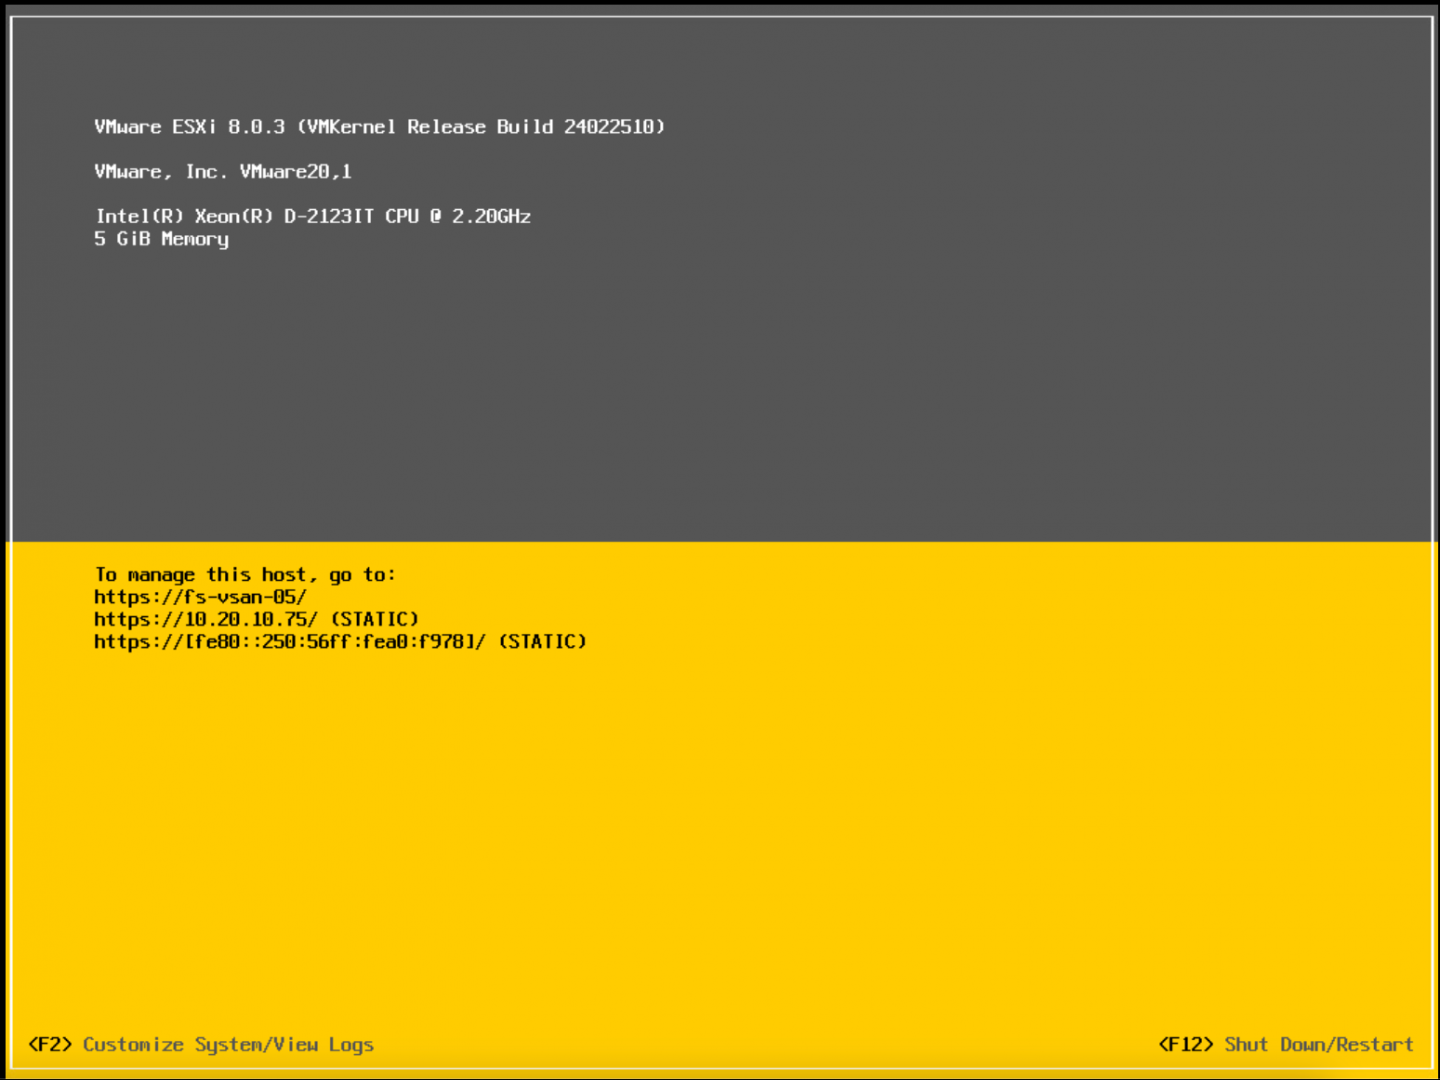
(virtual ESXi)


PowerShell Script: Set-WelcomeMessage Function


Here is the star of the show—my simple PowerShell function that taps into VMware’s PowerCLI to set Annotations.WelcomeMessage on your ESXi host. It even shows you the old message before setting the new one.

You can download it from my GitHub repo in ESXi folder from my GitHub repo: https://github.com/musil/vSphere_scripts or use this direct link to a script file: https://github.com/musil/vSphere_scripts/blob/main/ESXi/set_welcome_message.ps1

Function Set-WelcomeMessage {
    <#
        .SYNOPSIS
        This function retrieves the vCenter version and build number. 
        Based on https://knowledge.broadcom.com/external/article/315410/
    
        .NOTES
        File Name      : set_welcome_message.ps1
        Author         : Stanislav Musil
        Prerequisite   : PowerShell
        Website        : https://vpxd.dc5.cz/index.php/category/blog/
        X (Twitter)    : https://www.x.com/stmusil
    
        .DESCRIPTION
        The script is a function that takes a single parameter, the vCenter server name. Retrieves the version and build number. 
        To use the function, you can dot-source the script and then call the function. 
        Windows:   . .\set_welcome_message.ps1
        Mac/Linux: . ./set_welcome_message.ps1
    
        .EXAMPLE
        Set-WelcomeMessage -Hostname "ESXi.example.com" -WelcomeMessage "Welcome to {{hostname}"

    #>
    param (
        [string]$HostName,
        [string]$WelcomeMessage
    )
   
    # Ensure PowerCLI module is imported
    if (-not (Get-Module -Name VMware.VimAutomation.Core -ErrorAction SilentlyContinue)) {
        Import-Module VMware.VimAutomation.Core
    }`

# Define the target host and the parameter values
$ESXihost = Get-VMHost -Name $HostName
$paramName = "Annotations.WelcomeMessage"

$current = Get-AdvancedSetting -Entity $ESXihost -Name $paramName
Write-Host "Current Weclome message:"  $current.Value

# Set the advanced parameter
Get-AdvancedSetting -Entity $ESXihost -Name $paramName | Set-AdvancedSetting -Value $WelcomeMessage -Confirm:$false

# Verify the change
$updatedSetting = Get-AdvancedSetting -Entity $ESXihost -Name $paramName
Write-Output "New $paramName value on $ESXihost : $($updatedSetting.Value)"

}

How to Run It

1. Dot-source the script (so the function is recognized):

  • On Windows:
. .\set_welcome_message.ps1
  • On Mac/Linux:
. ./set_welcome_message.ps1

2. Execute the function:

Set-WelcomeMessage -Hostname "ESXi.example.com" -WelcomeMessage "Welcome to my ESXi host!"


3. That’s it! Now when you check the DCUI over iDRAC/IPMI/iLO etc.. or on directly on console screen, you’ll see your brand-new custom text.

Change it back to default

just set empty parameter 🙂

Set-WelcomeMessage -Hostname "ESXi.example.com" -WelcomeMessage ""

Final Thoughts

Customizing your ESXi’s welcome message is quick, easy, and surprisingly fun. Whether you’re adding a helpful notice or just a silly greeting, a personal touch goes a long way. Give it a try, and see if your team notices!


Happy customizing!

Manual way

https://knowledge.broadcom.com/external/article/315410

Advanced Examples

To get much awesome welcome message you need to use much complicated formating tags.

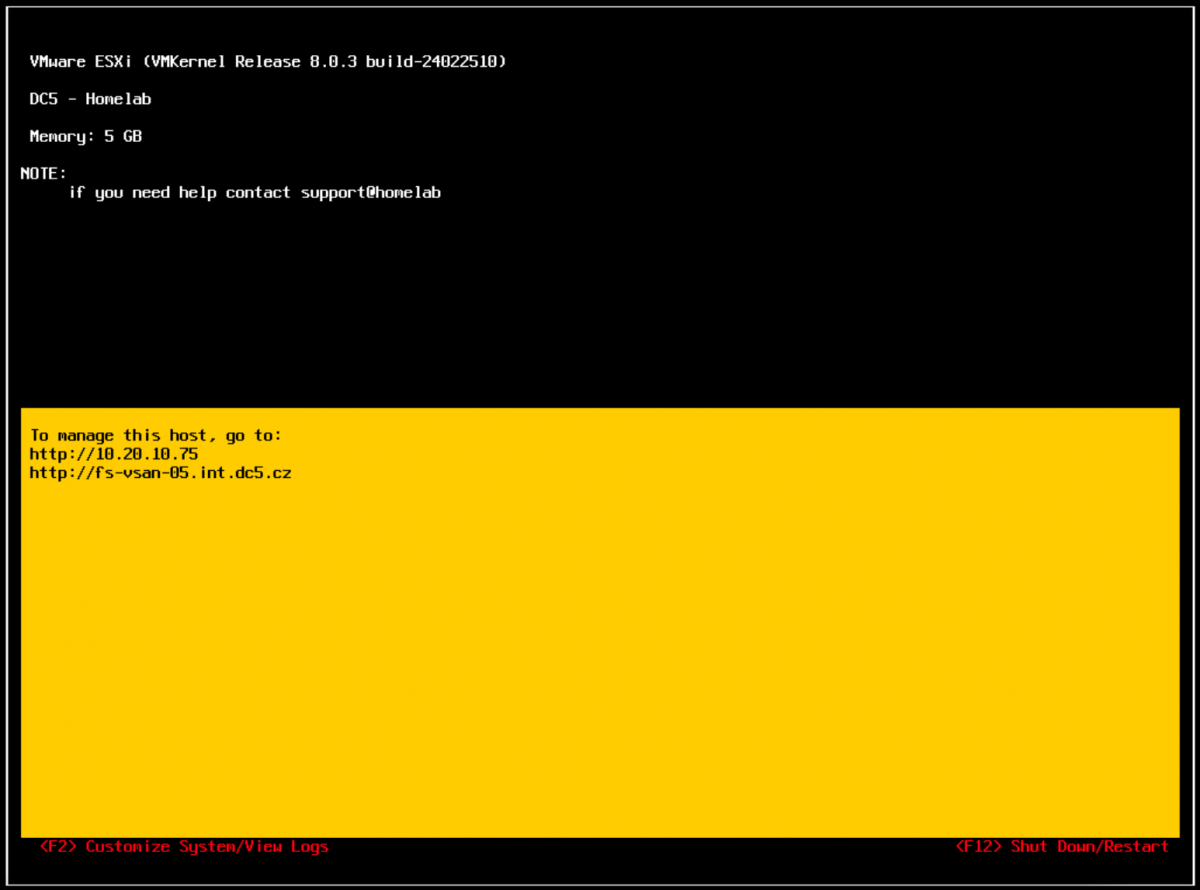
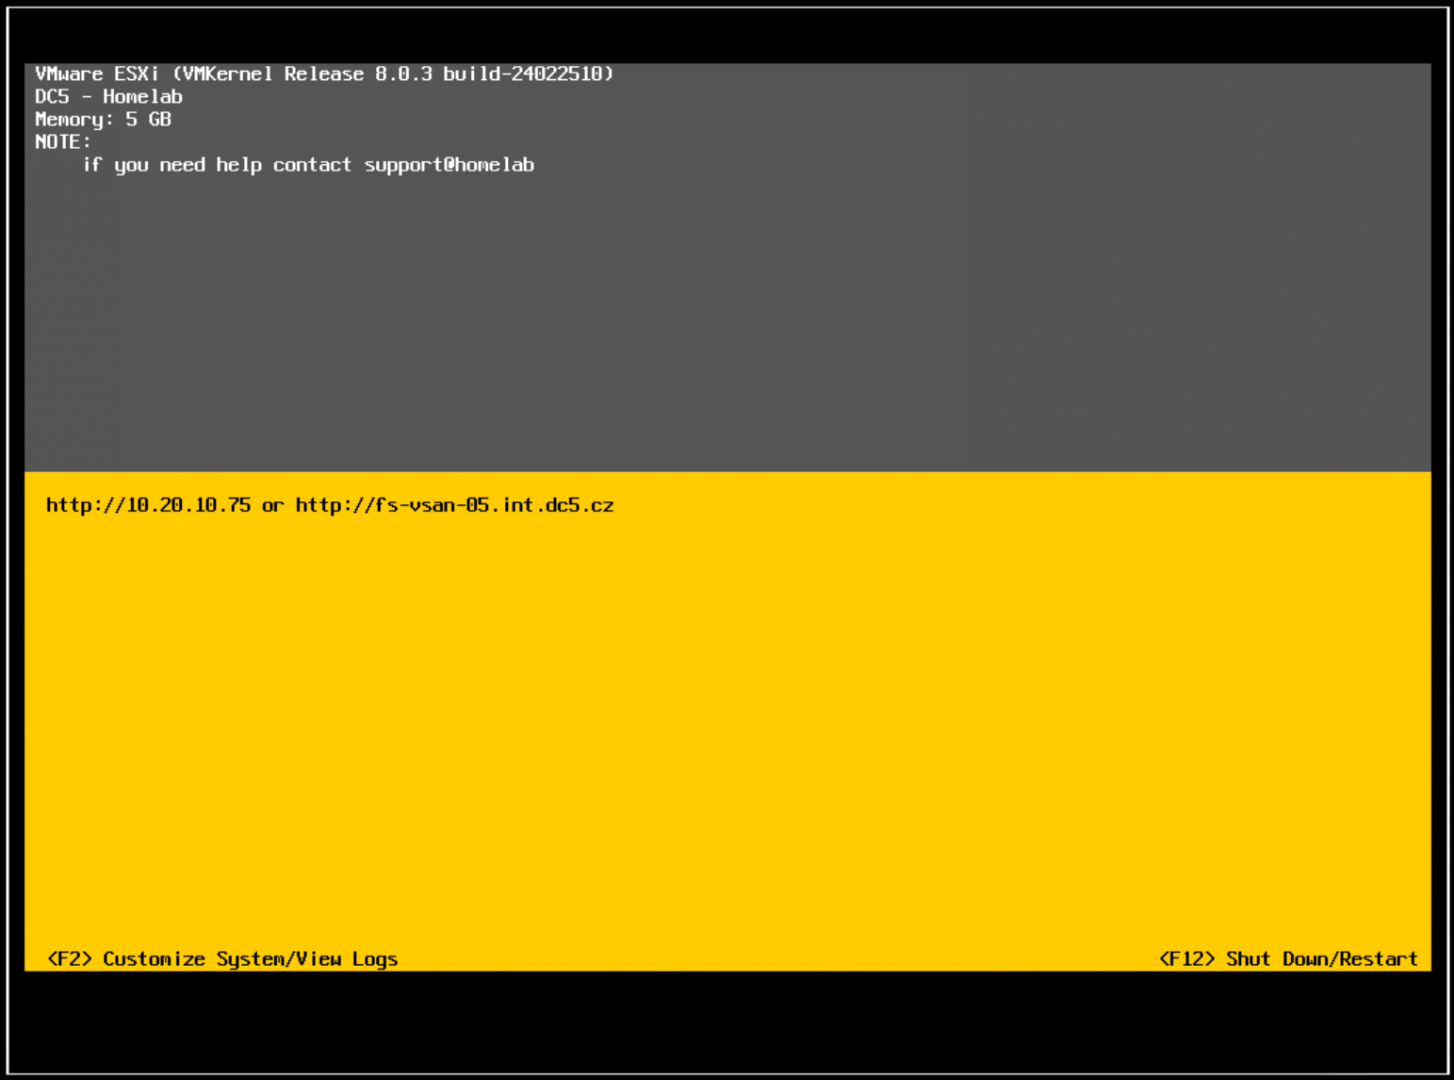
Welcome DCUI screen from my homelab:
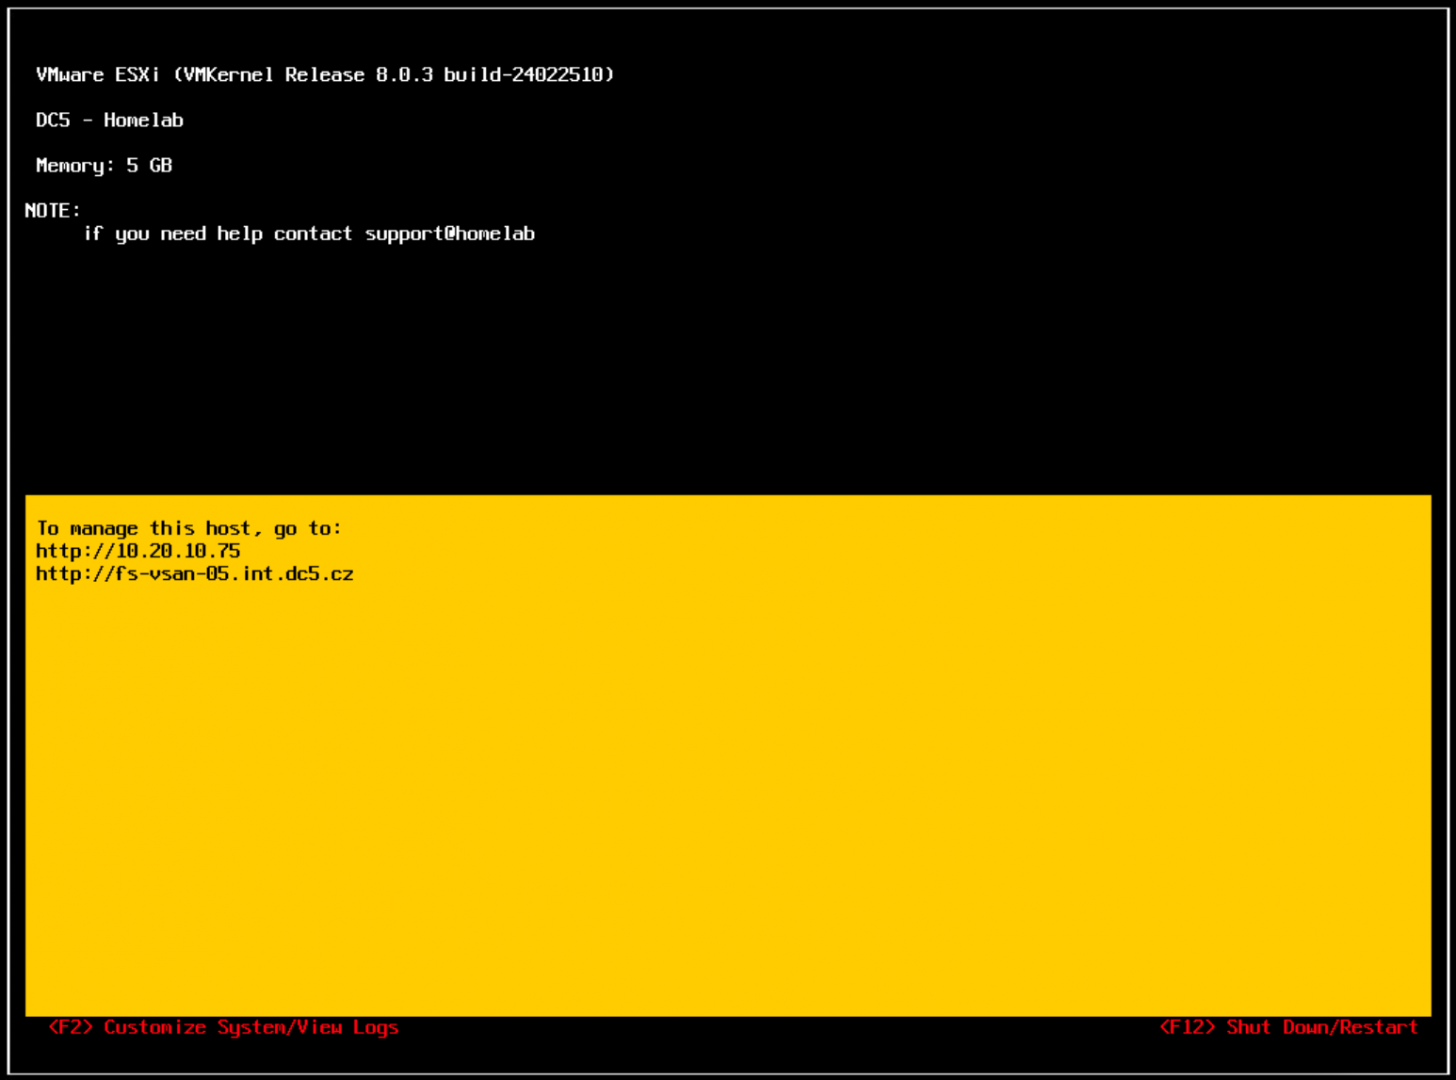
My Homelab Welcome Message

To make it more easy I just “save” all the parameters of the welcome message into the variable $a.


$a="
{align:left}{bgcolor:black}{color:white} {esxproduct} (VMKernel Release {esxversion})
{bgcolor:black}{align:left}
{align:left}{bgcolor:black}{color:white} DC5 - Homelab
{bgcolor:black}{align:left}
{align:left}{bgcolor:black}{color:white} Memory: {memory}
{bgcolor:black}{align:left}
{align:left}{bgcolor:black}{color:white}NOTE:
{align:left}{bgcolor:black}{color:white}     if you need help contact support@homelab
{bgcolor:black}{align:left}
{bgcolor:yellow}{color:black}                                                                                                                            
{bgcolor:yellow}{color:black} To manage this host, go to:                                                                                                
{bgcolor:yellow}{color:black} http://{ip}                                                                                                         
{bgcolor:yellow}{color:black} http://{hostname}                                                                                               
{bgcolor:yellow}{color:black}                                                                                                                            
{align:left}{bgcolor:black} {color:red} <F2> Customize System/View Logs                                                                   <F12> Shut Down/Restart {/align}
"

And then just run the same command and instead of welcome message I used the $a variable

Set-WelcomeMessage -Hostname "fs-vsan-05.int.dc5.cz" -WelcomeMessage $a

Happy experimenting with different colors 🙂

Another screenshots from my testing
Homelab 2022

LAB for 2022 is ready. Last year the price of the energy go so high, that I must to turn off some of my servers. So they are not running 24×7 🙁 Usually I run 2x vCenters, NSX-T, VSAN, Cloud Director, vRO, vRLI, Tanzu, K8S etc.. and a lots of linux VM’s all for testing and learning purpose. Licenses I have are from vExpert and VMUG Advantage.

2022-01-21

DC5

Networking:

  • Internet 500Mbit
  • Zyxel XS1930 (10gbit)
  • Zyxel GS1920
  • Mikrotik CRS 312 (12x 10Gbit)
Continue reading “Homelab 2022”

Homelab 2021

LAB for 2021 is ready. Last year new home DC building has been build.
Usually I run 2x vCenters, NSX-T, NSX-V, VSAN, Cloud Director, vRO, vRLI etc..
and a lots of linux VM’s all for testing and learning purpose. Licenses I have are from vExpert and VMUG Advantage.

2021-01-17

DC5

Networking:

  • Internet 500Mbit
  • Cisco 2970G
  • Zyxel GS1920
  • Mikrotik CRS 305 (4x 10Gbit)
  • Mikrotik CRS 312 (12x 10Gbit)
Continue reading “Homelab 2021”

Homelab 2020

Still in progress… not all HW is in the list.. for now just the CORE HW is in the list… and new homeDC building is being build ..

DC5

Networking:

  • Internet 500Mbit
  • Cisco 2970G
  • Zyxel GS1920

Compute:

DELL R710

  • 2x Xeon
  • 192 GB RAM
  • iDRAC
  • 4x NIC

DELL R710

  • 1x Xeon
  • 92GB RAM
  • 4x NIC

DELL R710

  • 1x Xeon
  • 92GB RAM
  • 4x NIC

NUC1 – Test & Dev

  • i3-6100U @ 2.3GHz
  • 32GB RAM
  • 256GB NVMe
  • 500GB SATA 2,5″
  • 2x 1Gbit NIC (one of them is USB TP-LINK U300)

VSAN ROBO:

ESX2 (whitebox)

  • Intel G4560 @ 3.5GHz
  • MB: B250M-D3H
  • 64GB RAM
  • 500GB NVMe Samsung 970EVO
  • 1TB SSD SATA Samsung 860EVO
  • 2x 256GB SSD SATA Kingston
  • 4x 1Gbit NIC
  • 2x 10Gbit NIC (intel X540-AT2) Base-T

ESX5

  • Xeon D-2123IT @ 2.2GHz
  • MB: Supermicro SYS-E300-9D-4CN8TB
  • 128GB RAM
  • 500GB NVMe Samsung 970EVO
  • 1TB SSD SATA Samsung 860EVO
  • IPMI
  • 4x 1Gbit NIC
  • 2x 10Gbit NIC (intel X722) Base-T
  • 2x 10Gbit NIC (intel X722) SFP+

Storage:

NearStore

  • Xeon E3-1220L @2.3GHz (4core)
  • MB: Supermicro X9SCM
  • Case: Nanoxia Deep Silence 6, Rev. B
  • 32GB RAM
  • 16x 2TB SATA
  • 3x 3TB SATA
  • IPMI
  • 2x 1Gbit NIC (82574LM + 82574L)
  • 2x 10Gbit NIC (intel X540-AT2) Base-T
  • 1x 10Gbit Asus

QNAP 653Pro

  • 6x 3TB SATA
  • 4x 1Gbit

DC 1

Networking:

  • Internet 100Mbit

Compute:

GOLEM – ESXi 6.5.0 – Build 10719125

  • Xeon X3450 @ 2.67GHz
  • MB: S3420GP
  • Case: 1U
  • 24GB RAM
  • 5x 1Gbit NIC
  • 2x 1TB HDD SATA
  • 2x 512GB SSD SATA

D&R Site

Networking:

  • Internet 50Mbit

Compute:

ESX

  • Xeon E3-1220L @2.3GHz (4core)
  • MB: Supermicro X9SCM
  • 32GB RAM
  • 2TB SATA
  • 2x 1Gbit NIC (82574LM + 82574L)

Storage:

Synology DS210j

  • 2x 3TB SATA
  • 2x 1Gbit

HCI Bench – vSAN performance tool – Part 3: Tests and Results

Tests

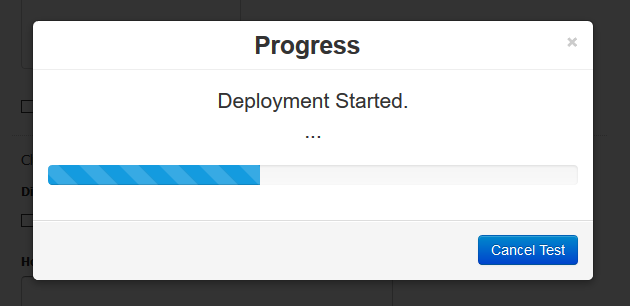
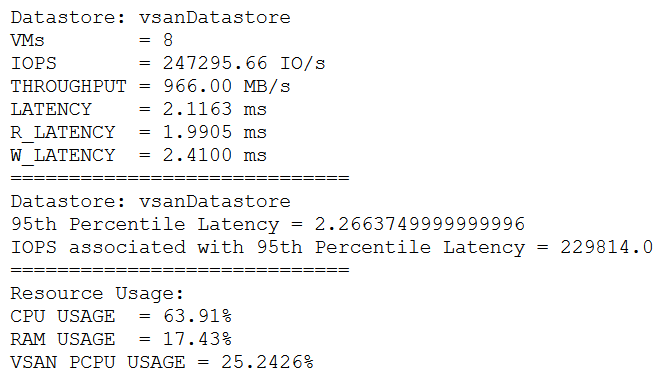
Once you hit the “Test” button you can go watch some movies. It’s take a time depend on your HW. For me it was couple of hours.

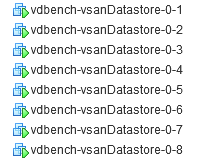
  • It starts with VM deployment

  • It will create bunch of VM’s (each 4vCPU, 4GB of RAM, 9xHDD (total 250GB))

Testing was done by using Vdbench VM with input argument “-fvdb-8vmdk-100ws-4k-70rdpct-100randompct-8threads

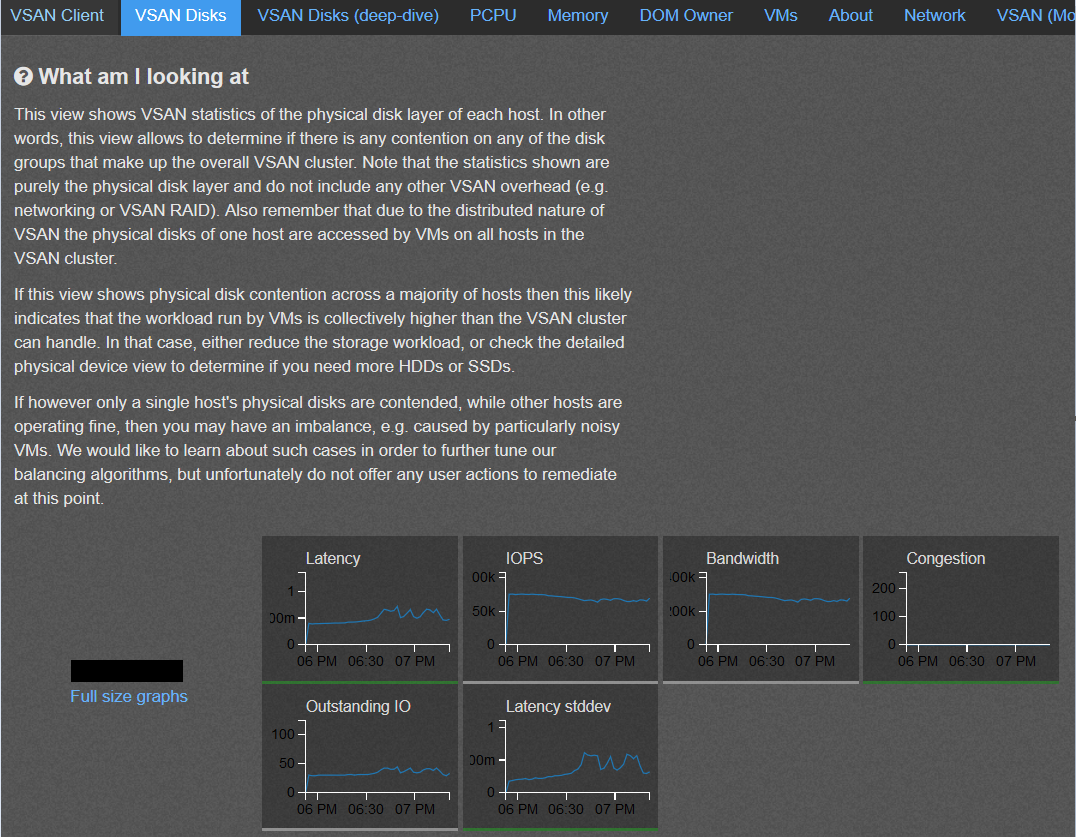
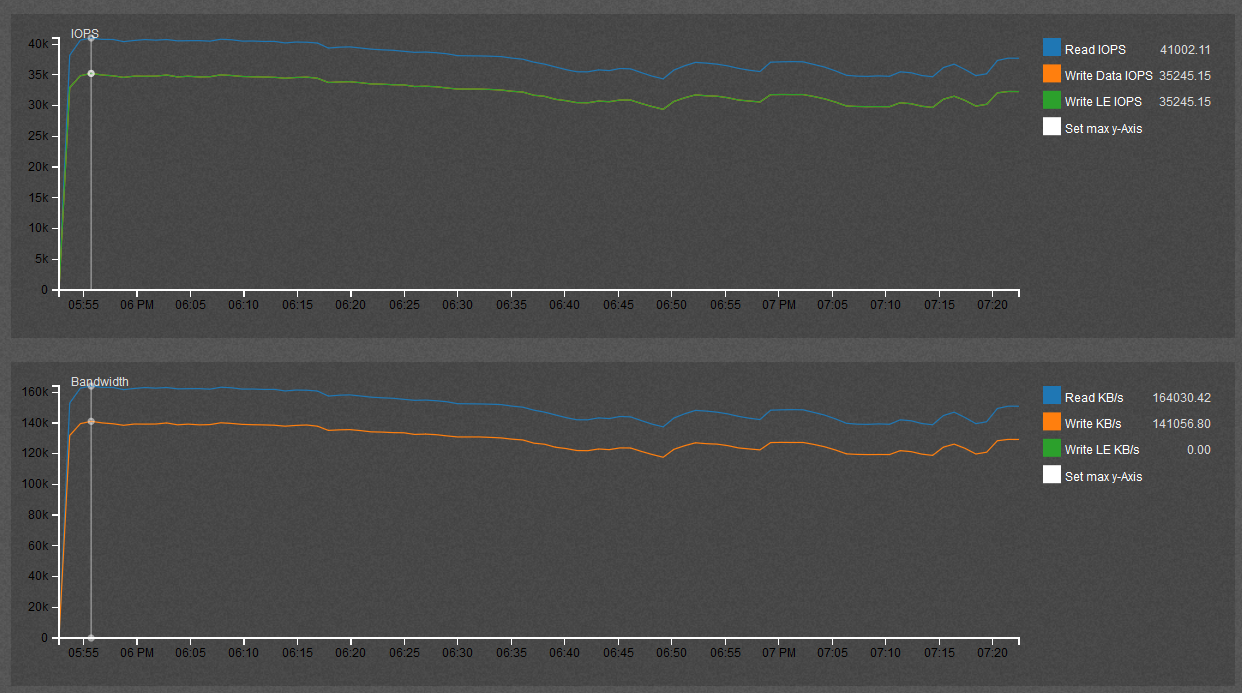
Results

Tested VSAN configuration:

  • 4x Node configuration with 10gigabit connection
  • VC build: VMware vCenter Server 6.5.0 build-7515524

Each ESXi host:

  • Build: VMware ESXi 6.5.0 build-7388607
  • CPU: Intel(R) Xeon(R) Silver 4114 CPU @ 2.20GHz ( Packages: 2, Cores: 20 )
  • Memory: 256 GB
  • Server vendor/model: Dell Inc. PowerEdge FC640
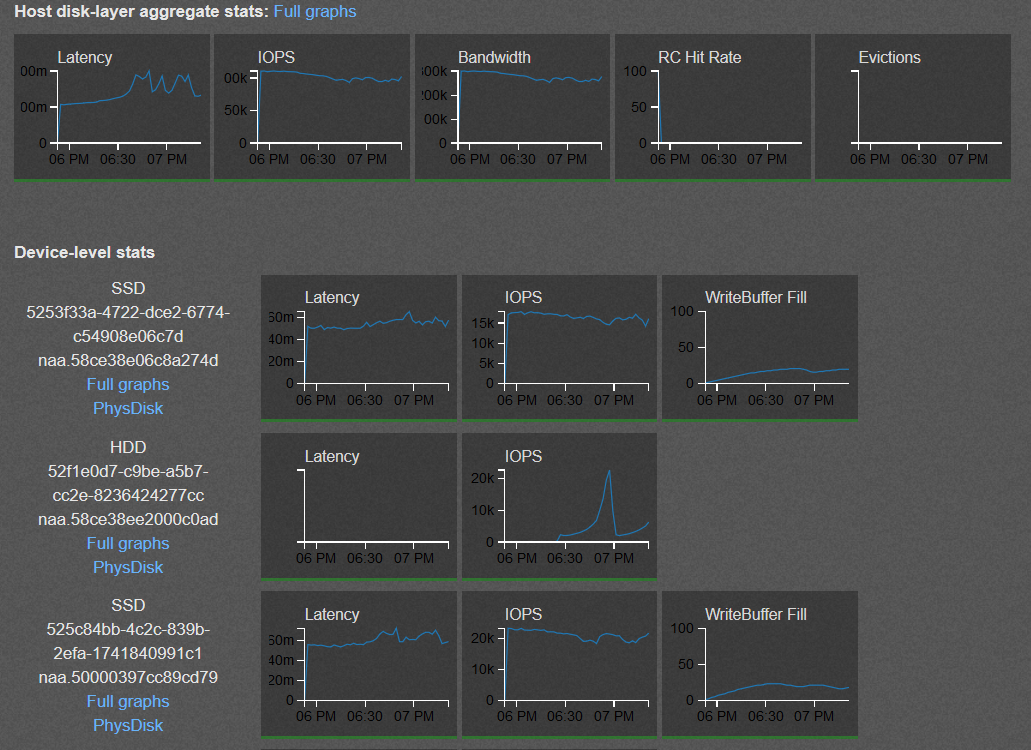
  • VSAN Disks:
    • SSD: Local TOSHIBA Disk (naa.58ce38ee2000c0ad)
      • TOSHIBA PX05SMB080Y
      • 800 GB
    • SSD: Local TOSHIBA Disk (naa.58ce38e06c8a274d)
      • TOSHIBA PX05SRB192Y
      • 1920 GB
    • SSD: Local TOSHIBA Disk (naa.58ce38e06c8a26fd)
      • TOSHIBA PX05SRB192Y
      • 1920 GB
    • SSD: Local TOSHIBA Disk (naa.50000397cc89cd79)
      • TOSHIBA PX05SMB080Y
      • 800 GB

new NUC in my home lab


Home LAB starts to grow. More and more test lab VM’s, nested ESXi hosts etc. So  I was looking for another node. Dont want to spent a fortune so the price was the key. I had also other minimum requirements as 32GB of RAM and power consumption. After few weeks of searching I decide to buy a Intel NUC.

Components added to my #HOMELAB:

  • Intel 6th Generation NUC NUC6i3SYH
  • 2x Kingston 16GB DDR4 2133MHz SODIMM
  • USB3 TP-LINK  UE300 gigabit NIC
  • 8GB San Disk Cruzer Fit
  • HDMI to VGA adapter


Disclaimer: The Intel NUC is not on VMware’s official Hardware Compatibility List (HCL)

2nd NIC for my NUC

Intel NUC is the best piece of HW for HOME mini-LAB. But once you start grow you need more network bandwith. And one pNIC is not enough. After few sec of googling I find great page DevTTY. Where is a lot of information about “supported” USB NIC for your Intel NUC. I choose TP-LINK UE300 because I had a couple of TP-LINK (3210, 5426) switches and they are doing great job.

So I ordered TP-LINK UE300 USB 3.0 network card. Once it was delivered to me, I connected it to the NUC. Then download the driver from DevTTY and upload it to one of my datastore.  No maintenance, reboot is needed. The only thing you need to do is to change the “Host Image Profile Acceptance Level”  to  “Community supported”.

Host Image Profile Acceptance Level-Community

Then just log in to the ESXi console and install VIB file with command:

Continue reading “2nd NIC for my NUC”