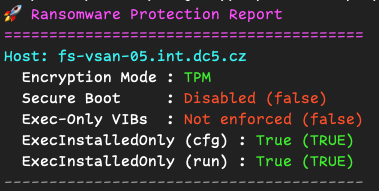
Cybersecurity threats, especially ransomware, are constantly evolving, so it’s important to regularly audit your ESXi hosts to ensure they have the proper protections enabled. Today I want to share a simple but effective PowerCLI script, Get-RansomwareProtectionStatus, that quickly checks your VMware hosts for important ransomware-related security configurations.
🚀 What This Script Does This script focuses on three key settings that enhance protection against ransomware on your ESXi hosts:
Encryption Mode: Checks whether TPM-based encryption is active.
Secure Boot Enforcement: Confirms Secure Boot is enabled.
Exec-Installed-Only Mode (Configured & Runtime): Ensures only binaries from installed VMware VIB packages can execute.
Having these settings properly configured greatly reduces the risk of unauthorized code execution—exactly what you want to fight ransomware!
🔧 How to Use the Script
Here’s how simple it is. First connect to your vCenter and then run a script.
.\Get-RansomwareProtectionStatus.ps1 <HOST>
It generates a clear, colored summary, instantly telling you what’s secure and what needs your attention.
You can integrate this script into your monitoring routines, run it on multiple hosts with automation tools like Ansible Semaphore or GitLab CI, or even schedule regular audits.
⚡ Pro Tip: Save your reports to a file or push results directly to your monitoring dashboard to track security over time!
📦 Get the Script
Check out the script in my GitHub repo [link here] and let me know your thoughts! Direct link to script [here]
Feel free to comment or ping me on social media if you’ve enhanced it further or found a creative use case. Stay secure! 🛡️
Managing virtual network interfaces (vNICs) effectively is crucial for VMware administrators who want to optimize their virtual infrastructure. It’s important to note that modifying a VM’s in-guest virtual networking adapter link speed addresses OS or application-level limitations related to the default detected 10Gb speed of the vmxnet3 adapter. However, keep in mind that the actual network speed available to the VM is still limited by the physical hardware components, such as the host CPU and physical NICs.
Introducing the vNIC Link Speed PowerShell Script
I’ve developed a straightforward PowerShell script leveraging VMware’s PowerCLI to automate setting vNIC link speeds for your virtual machines.
How It Works
This script allows you to:
Select your virtual machine by name.
Choose the desired link speed (10,000 Mbps, 25,000 Mbps, 40,000 Mbps, or 65,000 Mbps). You can modify this script and set the speed between 10,000 Mbs and 65,000 Mbs.
Verify the power state of the VM and optionally power it off safely.
Automatically apply the new link speed settings to all vNICs of type vmxnet3.
Check and confirm the applied settings.
Requirements
Before you begin, ensure you have:
VMware PowerCLI installed and connected to your vCenter server.
Administrative privileges on vCenter and your VMs.
Usage Example
Here’s how easy it is to run the script:
PS> .\vNIC-LinkSpeed.ps1
The script will prompt you to enter the VM name and select your desired link speed from a simple menu. Verify the power state of the VM, prompting you to shut it down if necessary. If you choose not to power off the VM, the script will exit.
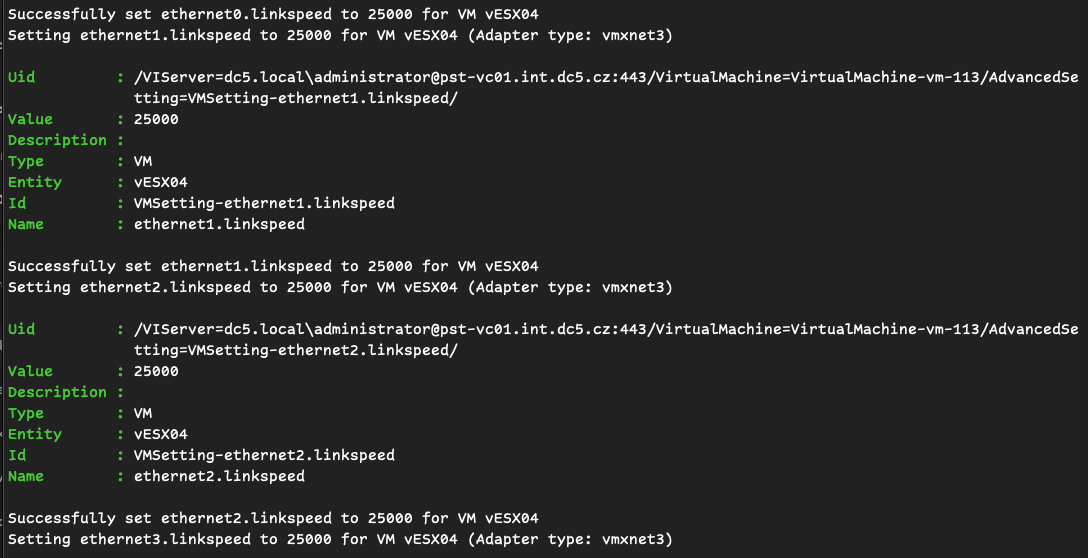
script output
In my case I change the link speed for my virtual ESXi.
Why Use This Script?
Efficiency: Automates repetitive tasks, saving you valuable time.
Reliability: Ensures consistent configuration across all vNICs.
Flexibility: Easily adaptable to any environment and extendable for future requirements.
Download and Customize
You can download and customize the script from my GitHub repository https://github.com/musil/vSphere_scripts (direct link to file -> vNIC-LinkSpeed.ps1 ), or copy it directly from this blog post and adapt it according to your specific needs.
<#
.SYNOPSIS
    This script sets the link speed for all vNICs of a specified VM to a user-selected value.

.DESCRIPTION
    This script modifies the advanced settings of the specified VM's vNICs to set a new link speed.

.AUTHOR
    Stanislav Musil

.VERSION
    1.0

.DATE
    2024-06-28

.PARAMETER vmName
    The name of the virtual machine.

.PARAMETER linkSpeed
    The desired link speed for the virtual machine's vNICs.
    This parameter specifies the speed (in Mbps) to set for each vNIC.

.NOTES
    Requirements: PowerCLI module installed and connected to vCenter.
    KB: https://knowledge.broadcom.com/external/article/368812/how-to-change-the-vmxnet3-link-speed-of.html

.EXAMPLE
    Show how to run the script, e.g.:
    PS> .\vNIC-LinkSpeed.ps1

#>

# Variables
$vmName = Read-Host "Enter the name of the VM"
$options = @(10000, 25000, 40000, 65000)
Write-Host "Select a link speed from the options below:"
for ($i = 0; $i -lt $options.Count; $i++) {
    Write-Host "$($i+1)): $($options[$i])"
}
$selected = Read-Host "Enter the number for your desired link speed"
if (($selected -as [int]) -and ($selected -ge 1) -and ($selected -le $options.Count)) {
    $linkSpeed = $options[$selected - 1]
    Write-Host "You selected: $linkSpeed"
} else {
    Write-Host "Invalid selection. Exiting."
    exit
}

# Get the VM object
$vm = Get-VM -Name $vmName

# Check VM PowerState
if ($vm.PowerState -ne "PoweredOff") {
    Write-Host "VM '$vmName' is currently $($vm.PowerState)."
    $response = Read-Host "Do you want to shut down the VM now? (y/n)"
    if ($response -eq 'y') {
        Stop-VM -VM $vm -Confirm:$false
        Write-Host "Waiting for VM to power off..."
        while ((Get-VM -Name $vmName).PowerState -ne "PoweredOff") {
            Start-Sleep -Seconds 5
            Write-Host "Still waiting for VM to power off..."
        }
        Write-Host "VM is now powered off."
    } else {
        Write-Host "Please power off the VM and run the script again."
        break
    }
}

# Get all network adapters (NICs) on the VM
$nics = Get-NetworkAdapter -VM $vm

# Loop through each NIC and set the corresponding advanced setting
for ($i = 0; $i -lt $nics.Count; $i++) {
    $nic = $nics[$i]
    $settingKey = "ethernet$($i).linkspeed"
    if ($nic.Type -eq "Vmxnet3") {
        Write-Host "Setting $settingKey to $linkSpeed for VM $vmName (Adapter type: vmxnet3)"
        New-AdvancedSetting -Entity $vm -Name $settingKey -Value $linkSpeed -Force -Confirm:$false
        Write-Host "Successfully set $settingKey to $linkSpeed for VM $vmName"
    } else {
        Write-Host "Skipping $settingKey (Adapter type: $($nic.Type) is not vmxnet3)"
    }
}


Write-Host "Checking what is set for each vNIC:"

# Check what is set for each vNIC
for ($i = 0; $i -lt $nics.Count; $i++) {
    $settingKey = "ethernet$($i).linkspeed"
    $currentSetting = Get-AdvancedSetting -Entity $vm -Name $settingKey -ErrorAction SilentlyContinue
    if ($currentSetting) {
        Write-Host "$settingKey : $($currentSetting.Value)"
    } else {
        Write-Host "$settingKey : Not set"
    }
}
# Final confirmation message
Write-Host "`nAll vNIC link speeds have been set to $linkSpeed."
Write-Host "`nAdvanced settings updated for all NICs.`n"
Additional Resources
For more detailed information on managing vNIC link speeds and advanced settings, refer to this VMware knowledge base article: KB 368812
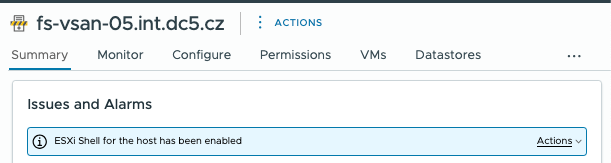
If you’re managing VMware environments, you might occasionally run into persistent shell warning alerts in your ESXi hosts. Thankfully, you can quickly find and suppress these warnings with a bit of PowerCLI magic.
Check for ESXi Hosts with Shell Warnings
Show the actual advanced settings on all hosts. Log into vCenter using PowerCLI and run this command:
This command immediately disables the shell warnings on selected hosts. No more alerts in GUI!
Command output:
Entity                Name                          Value
------                ----                          -----
fs-vsan-05.int.dc5.cz UserVars.SuppressShellWarning     1
Why (Not) Suppress Shell Warnings?
It’s important to note that suppressing shell warnings is only advisable in lab or non-production environments. In production environments, shell warnings provide valuable security reminders. Always keep shell warnings enabled to maintain security awareness unless you’re working in a controlled test environment.
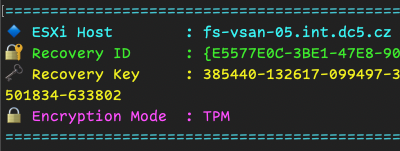
Managing encryption across multiple ESXi hosts can be a bit of a hassle. But don’t worry. I’ve got a simple PowerCLI script that’ll save you time and headaches by quickly retrieving encryption status and recovery keys from your VMware environment.
Why Do You Need This?
Ensuring your ESXi hosts are correctly encrypted is essential for security. Regular checks help prevent surprises later, especially during troubleshooting or audits.
Getting Started
First, make sure you’re connected to your vCenter:
Connect-VIServer -Server
Replace with your vCenter IP or FQDN.
The Script Breakdown
Here’s a quick rundown of the PowerCLI script to verify encryption settings across all ESXi hosts and who Recovery key for each ESXi host. (link to GitHub repository and file tpm_recovery_key_backup.ps1):
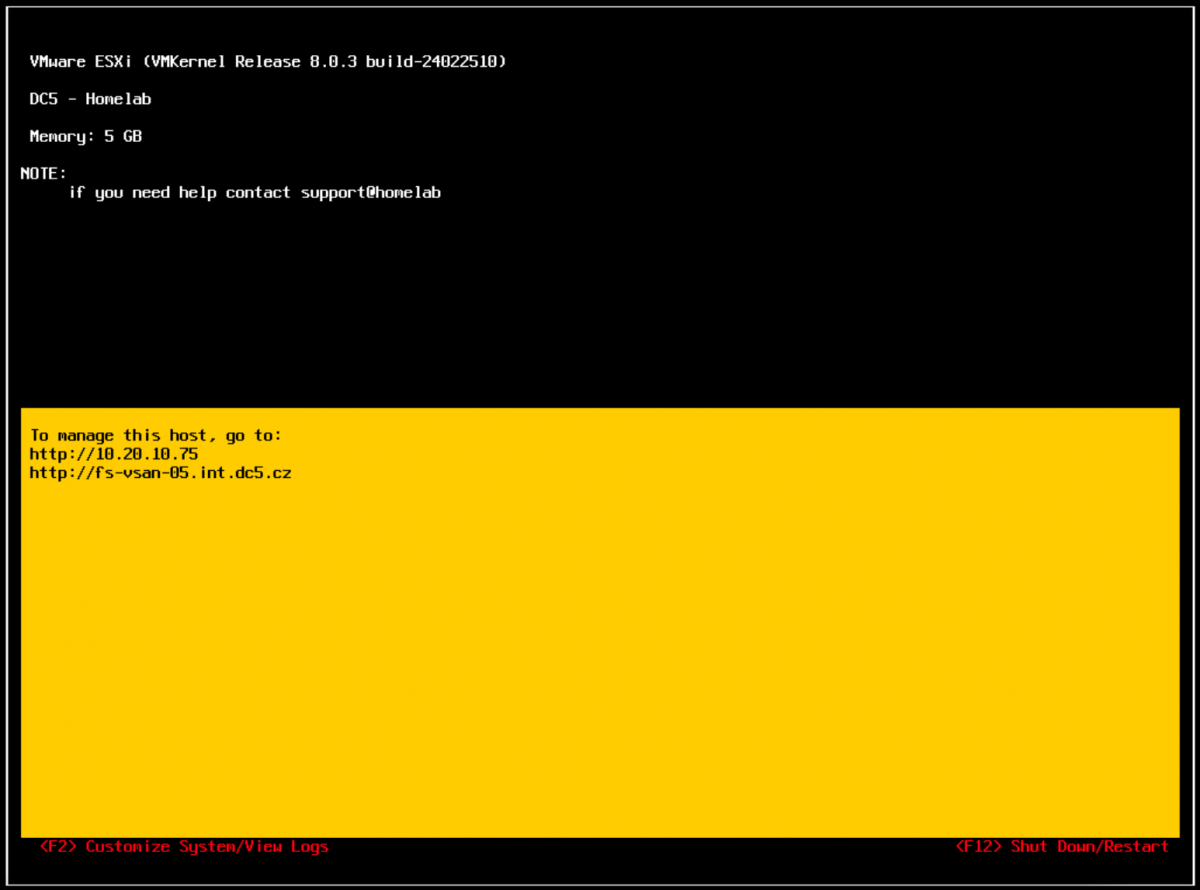
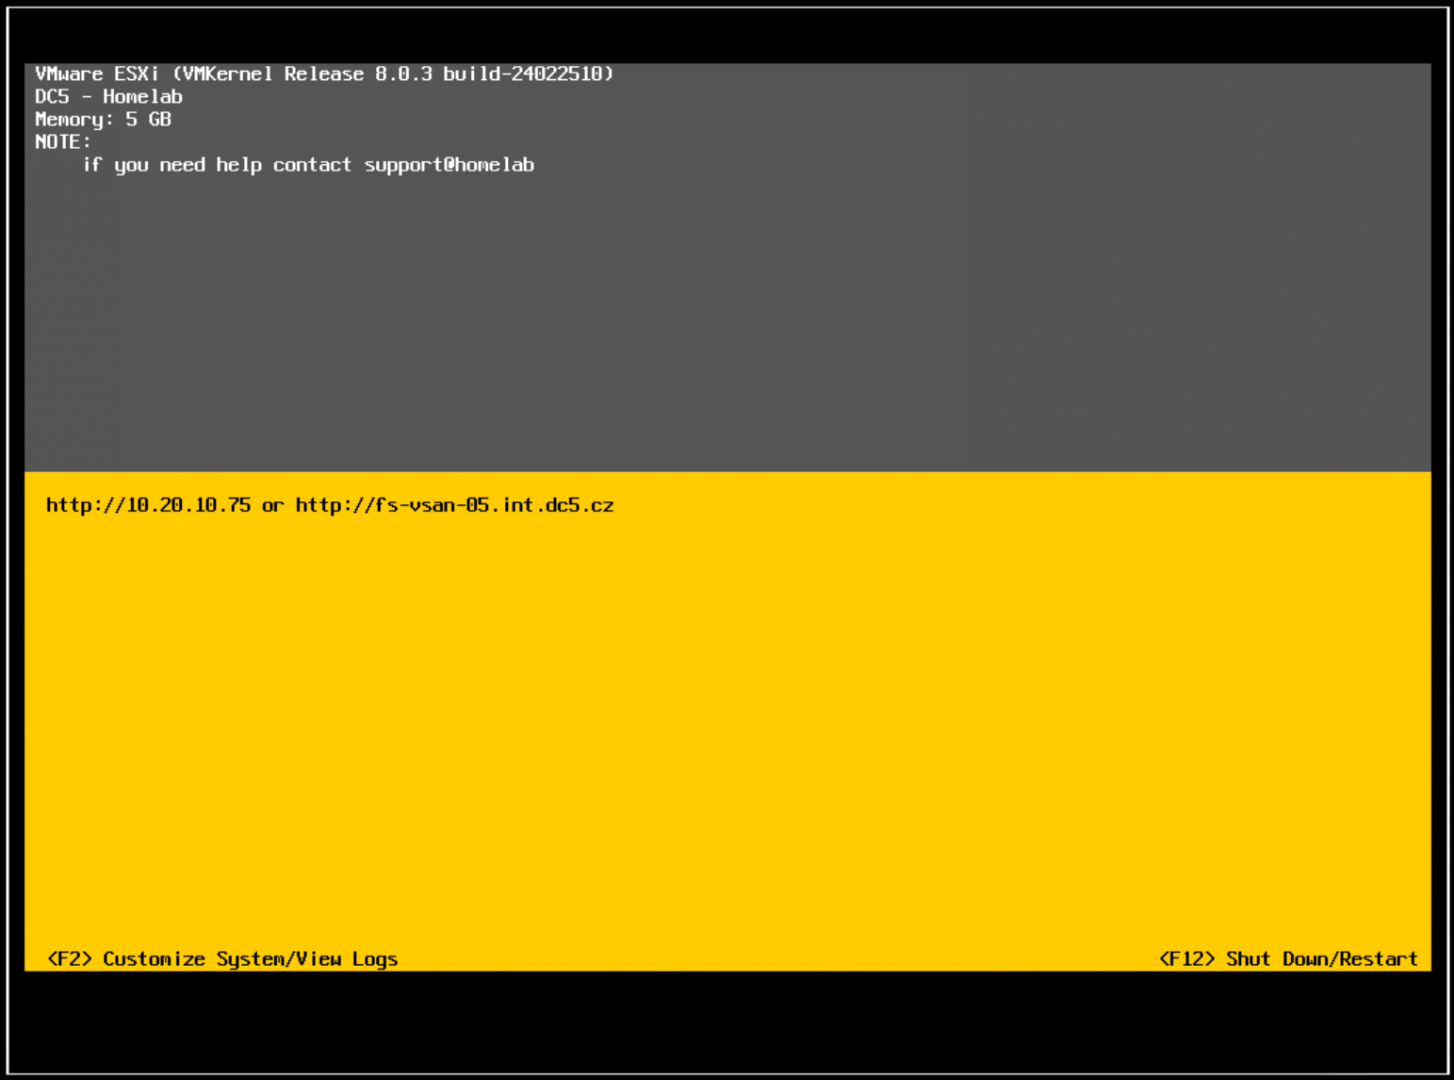
Ever wanted to spruce up that default login screen on your ESXi host or have some fun with your DCUI? Then you’re in the right place! In this post, I’ll walk through using the Annotations.WelcomeMessage advanced setting to display a custom welcome message on your ESXi host. Best of all, I’ll share a neat PowerShell function to make it easy.
Why Customize the Welcome Message?
Personalization: Display a personal greeting, instructions, or a quick reminder for anyone logging into the ESXi console.
Useful Info: Share contact details or support info in case someone needs to know who to call if something breaks.
Fun Factor: It’s always nice to see something other than “Welcome to VMware ESXi” from time to time at least in homelab.
Security: Display security/legal warning.
The Advanced Setting: Annotations.WelcomeMessage
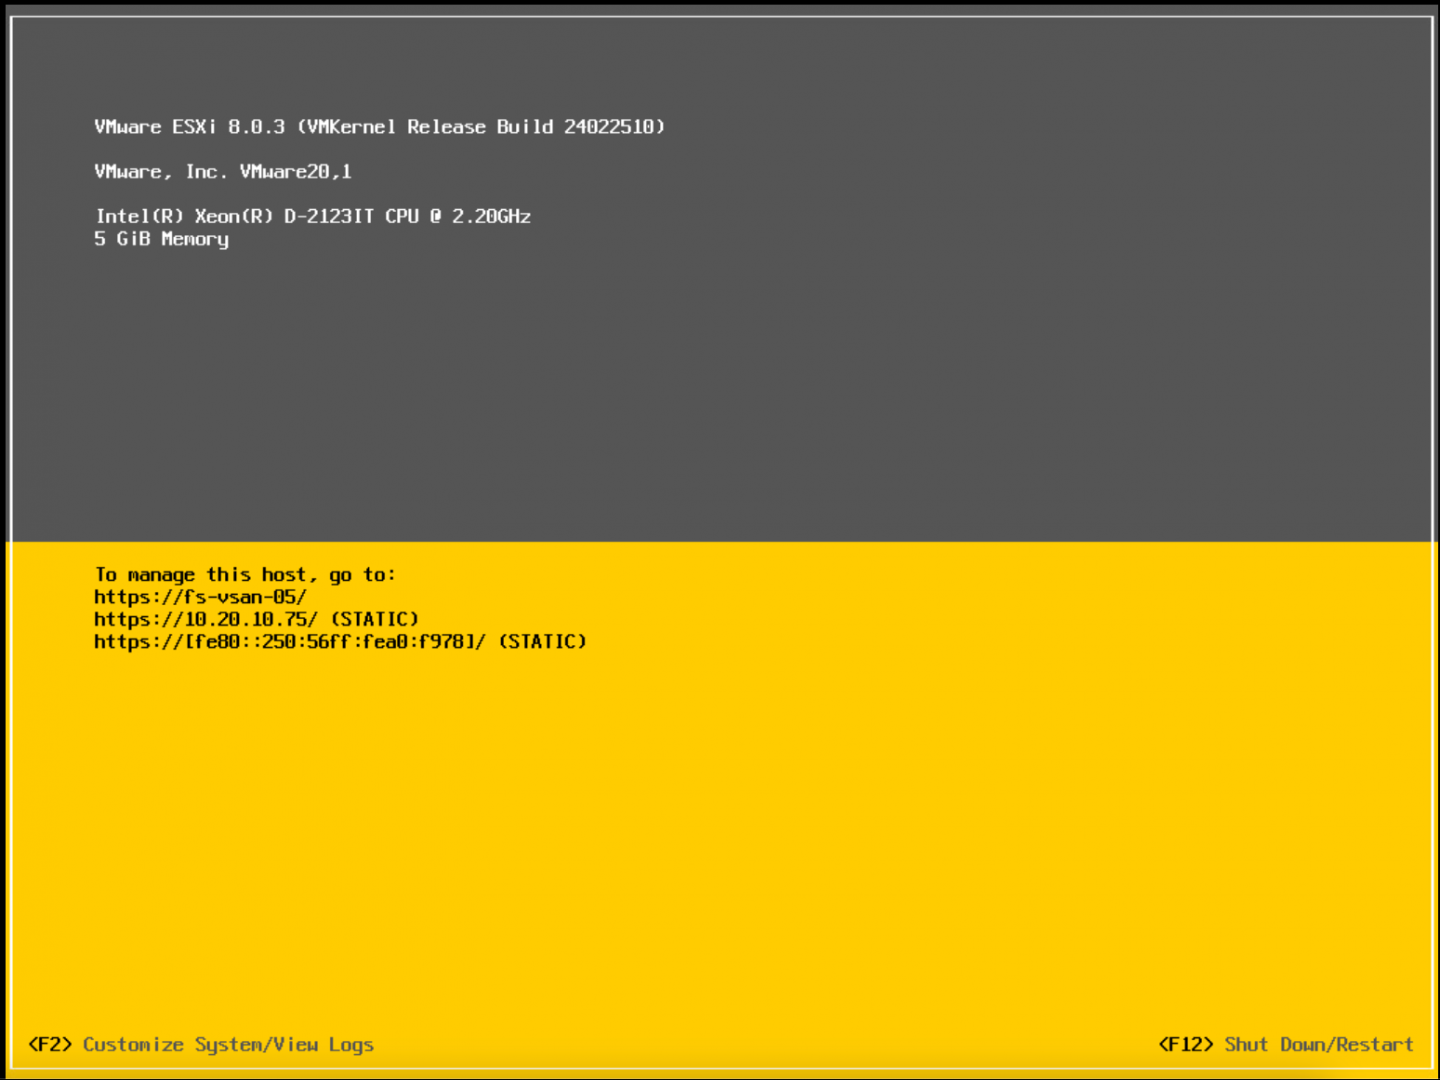
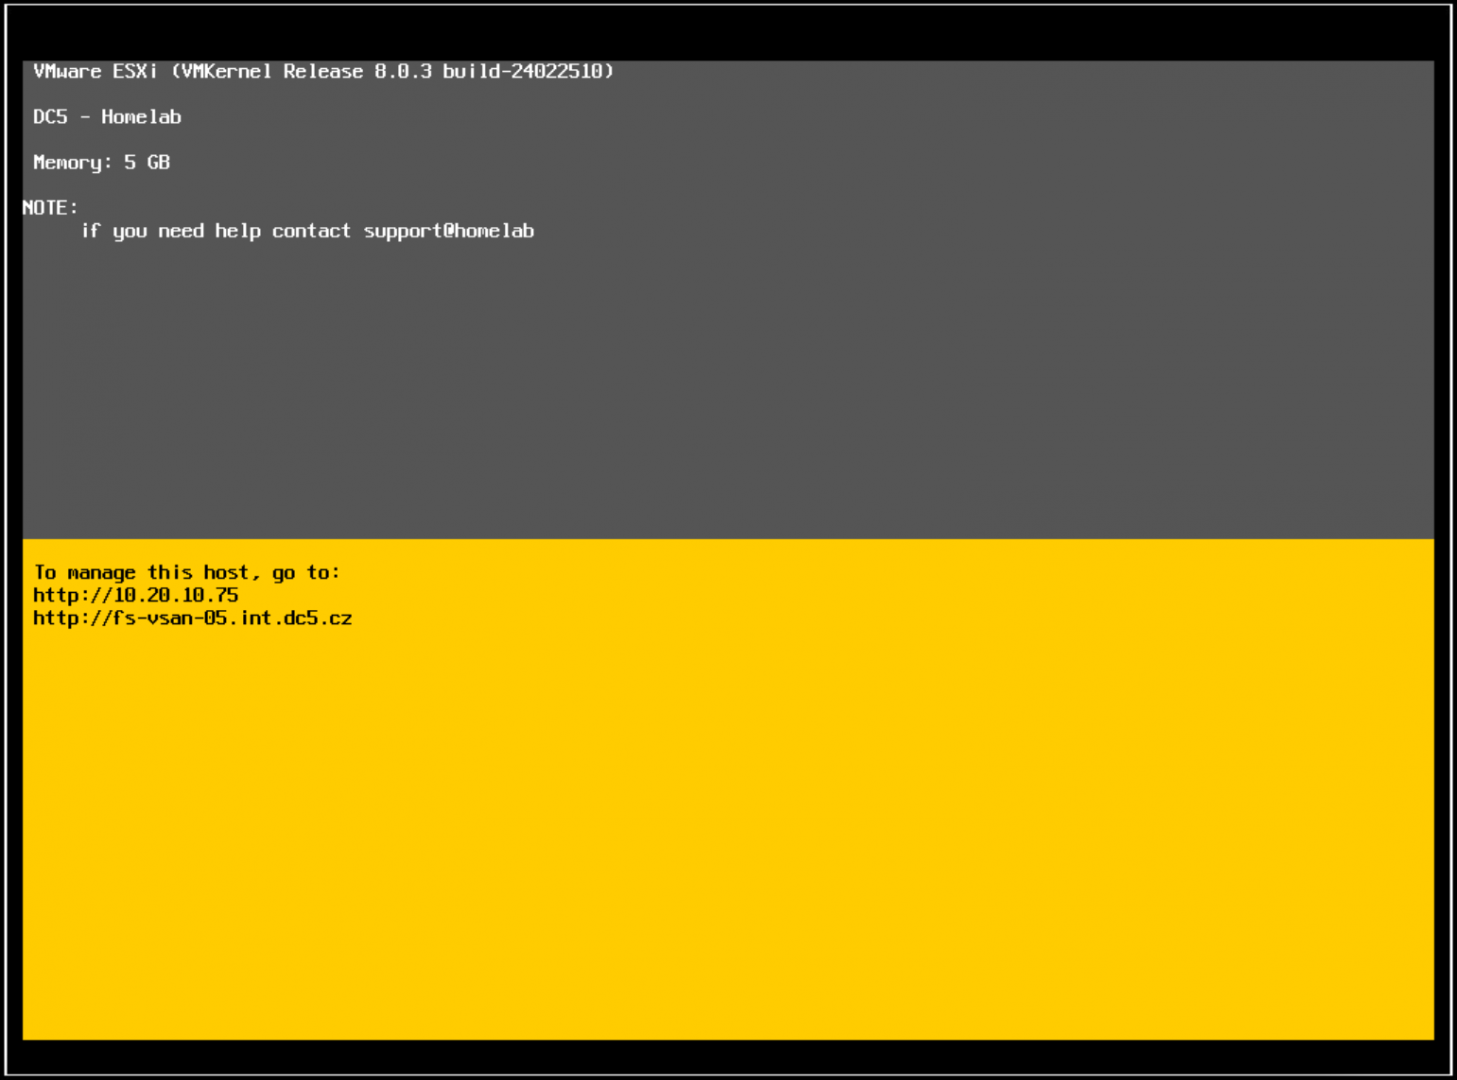
Annotations.WelcomeMessage is an advanced ESXi host parameter. It’s where you store the text you want displayed in DCUI on the default console screen (replacing some default text, similar to screenshot below).
(virtual ESXi)
PowerShell Script: Set-WelcomeMessage Function
Here is the star of the show—my simple PowerShell function that taps into VMware’s PowerCLI to set Annotations.WelcomeMessage on your ESXi host. It even shows you the old message before setting the new one.
Function Set-WelcomeMessage {
    <#
        .SYNOPSIS
        This function retrieves the vCenter version and build number.
        Based on https://knowledge.broadcom.com/external/article/315410/

        .NOTES
        File Name      : set_welcome_message.ps1
        Author         : Stanislav Musil
        Prerequisite   : PowerShell
        Website        : https://vpxd.dc5.cz/index.php/category/blog/
        X (Twitter)    : https://www.x.com/stmusil

        .DESCRIPTION
        The script is a function that takes a single parameter, the vCenter server name. Retrieves the version and build number.
        To use the function, you can dot-source the script and then call the function.
        Windows:   . .\set_welcome_message.ps1
        Mac/Linux: . ./set_welcome_message.ps1

        .EXAMPLE
        Set-WelcomeMessage -Hostname "ESXi.example.com" -WelcomeMessage "Welcome to {{hostname}"

    #>
    param (
        [string]$HostName,
        [string]$WelcomeMessage
    )

    # Ensure PowerCLI module is imported
    if (-not (Get-Module -Name VMware.VimAutomation.Core -ErrorAction SilentlyContinue)) {
        Import-Module VMware.VimAutomation.Core
    }`

# Define the target host and the parameter values
$ESXihost = Get-VMHost -Name $HostName
$paramName = "Annotations.WelcomeMessage"

$current = Get-AdvancedSetting -Entity $ESXihost -Name $paramName
Write-Host "Current Weclome message:"  $current.Value

# Set the advanced parameter
Get-AdvancedSetting -Entity $ESXihost -Name $paramName | Set-AdvancedSetting -Value $WelcomeMessage -Confirm:$false

# Verify the change
$updatedSetting = Get-AdvancedSetting -Entity $ESXihost -Name $paramName
Write-Output "New $paramName value on $ESXihost : $($updatedSetting.Value)"

}
How to Run It
1. Dot-source the script (so the function is recognized):
On Windows:
. .\set_welcome_message.ps1
On Mac/Linux:
. ./set_welcome_message.ps1
2. Execute the function:
Set-WelcomeMessage -Hostname "ESXi.example.com" -WelcomeMessage "Welcome to my ESXi host!"
3. That’s it! Now when you check the DCUI over iDRAC/IPMI/iLO etc.. or on directly on console screen, you’ll see your brand-new custom text.
Customizing your ESXi’s welcome message is quick, easy, and surprisingly fun. Whether you’re adding a helpful notice or just a silly greeting, a personal touch goes a long way. Give it a try, and see if your team notices!
If you are working with VMware environments, particularly with vCenter Server, it’s important to keep track of the version and build number of your vCenter instances. This script/function, Get-vCenterVersion, is designed to help you retrieve these details effortlessly. Here, we’ll break down my script, explaining each section, and provide examples of how to use it.
Overview of the Script
The Get-vCenterVersion function is a PowerShell script that retrieves the version and build number of a specified vCenter Server. It compares the build number against a predefined mapping to provide detailed information about the vCenter version, release date, and other associated details. This can be extremely useful for maintaining and upgrading your VMware infrastructure.
You can find the full script linked at the end of this article. 🙂
Sections of the Script
Script Header and Metadata
<#
    .SYNOPSIS
    This function retrieves the vCenter version and build number.
    Based on https://knowledge.broadcom.com/external/article?legacyId=2143838

    .NOTES
    File Name      : get-vcenter-version.ps1
    Author         : Stanislav Musil
    Prerequisite   : PowerShell
    Website        : https://vpxd.dc5.cz/index.php/category/blog/
    X (Twitter)    : https://www.x.com/stmusil

    .DESCRIPTION
    The script is a function that takes a single parameter, the vCenter server name. Retrieves the version and build number.
    To use the function, you can dot-source the script and then call the function.
    Windows:   . .\get-vcenter-version.ps1
    Mac/Linux: . ./get-vcenter-version.ps1

    .EXAMPLE
    Get-vCenterVersion -vCenterServer "vCenter.DC5.cz"
    or
    Get-vCenterVersion
#>
This section provides a summary of what the script does, including the author’s information, and usage instructions. It also includes an example of how to invoke the function. This is a standard way to document PowerShell scripts and makes it easier for others to understand and use your script.
Here, the script defines a parameter $vCenterServer, which is not mandatory. If the user does not provide a value, the script will use the default vCenter Server from the global environment variable $global:DefaultVIServer.
vCenter Version Mappings
$vCenterVersionMappings = @{
    "24026615"="vCenter Server 7.0 Update 3r","17.06.2024","7.0.3.02000","24026615","24026615"
    "23788036"="vCenter Server 7.0 Update 3q","21.05.2024","7.0.3.01900","23788036","23788036"
    ...
}
This dictionary (hashtable) contains a mapping of vCenter Server build numbers to their corresponding versions, release dates, and other details. This is the core of the script, enabling it to look up detailed information based on the build number.
The script retrieves the version and build number from the provided or default vCenter Server. If the build number exists in the predefined mappings, the script retrieves the corresponding details.
The script constructs a custom PowerShell object to output the details in a structured format. This makes it easy to further process or display the information.
Upgrade Check
if ($vCenterServerBuild -lt $greatestKey) {
    Write-Host "vCenter upgrade possible. `n" -ForegroundColor Red
} elseif ($vCenterServerBuild -eq $greatestKey) {
    Write-Host "Latest version/ up to date. `n" -ForegroundColor Green
} else {
    Write-Host "Update this script, looks like it's outdated. `n"  -ForegroundColor Magenta
}
Finally, the script compares the retrieved build number with the highest build number in the mapping to determine if an upgrade is available, if the system is up to date, or if the script itself needs updating.
Example Usage
Example 1: Retrieve vCenter Version with Default Server
If you are already connected to a vCenter Server and set it as the default ($global:DefaultVIServer), you can simply run:
Get-vCenterVersion
Example 2: Specify a vCenter Server
To retrieve the version for a specific vCenter Server, provide the server’s name:
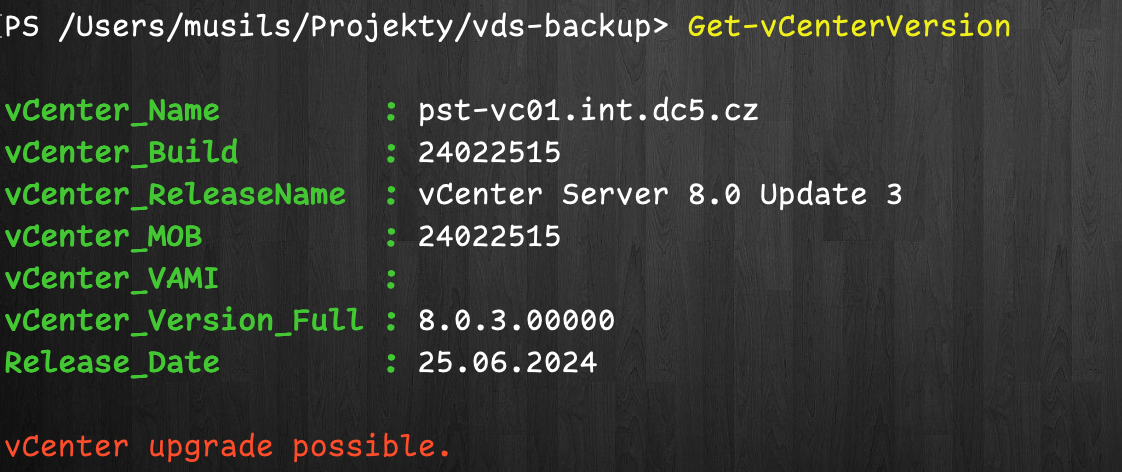
This will output detailed information about the vCenter Server, including its version, build number, and release date. If the vCenter Server is not on the latest version, the script will suggest that an upgrade is possible.
My homelab:
Conclusion
The Get-vCenterVersion script is a powercli function for anyone managing VMware vCenter Servers. By automating the retrieval and checking of vCenter versions, it helps ensure that your infrastructure is always up to date and secure. Whether you’re managing a single vCenter Server or multiple instances, this script can save you time and reduce the risk of version mismatches.
Feel free to customize the script to fit your environment, and remember to keep the version mapping updated as new vCenter Server versions are released!